Welcome, fellow tech enthusiasts! Mastering the Git workflow is like unlocking the secret code for managing your content effectively. So, buckle up as we take a simplified journey through Git and its command-line magic.
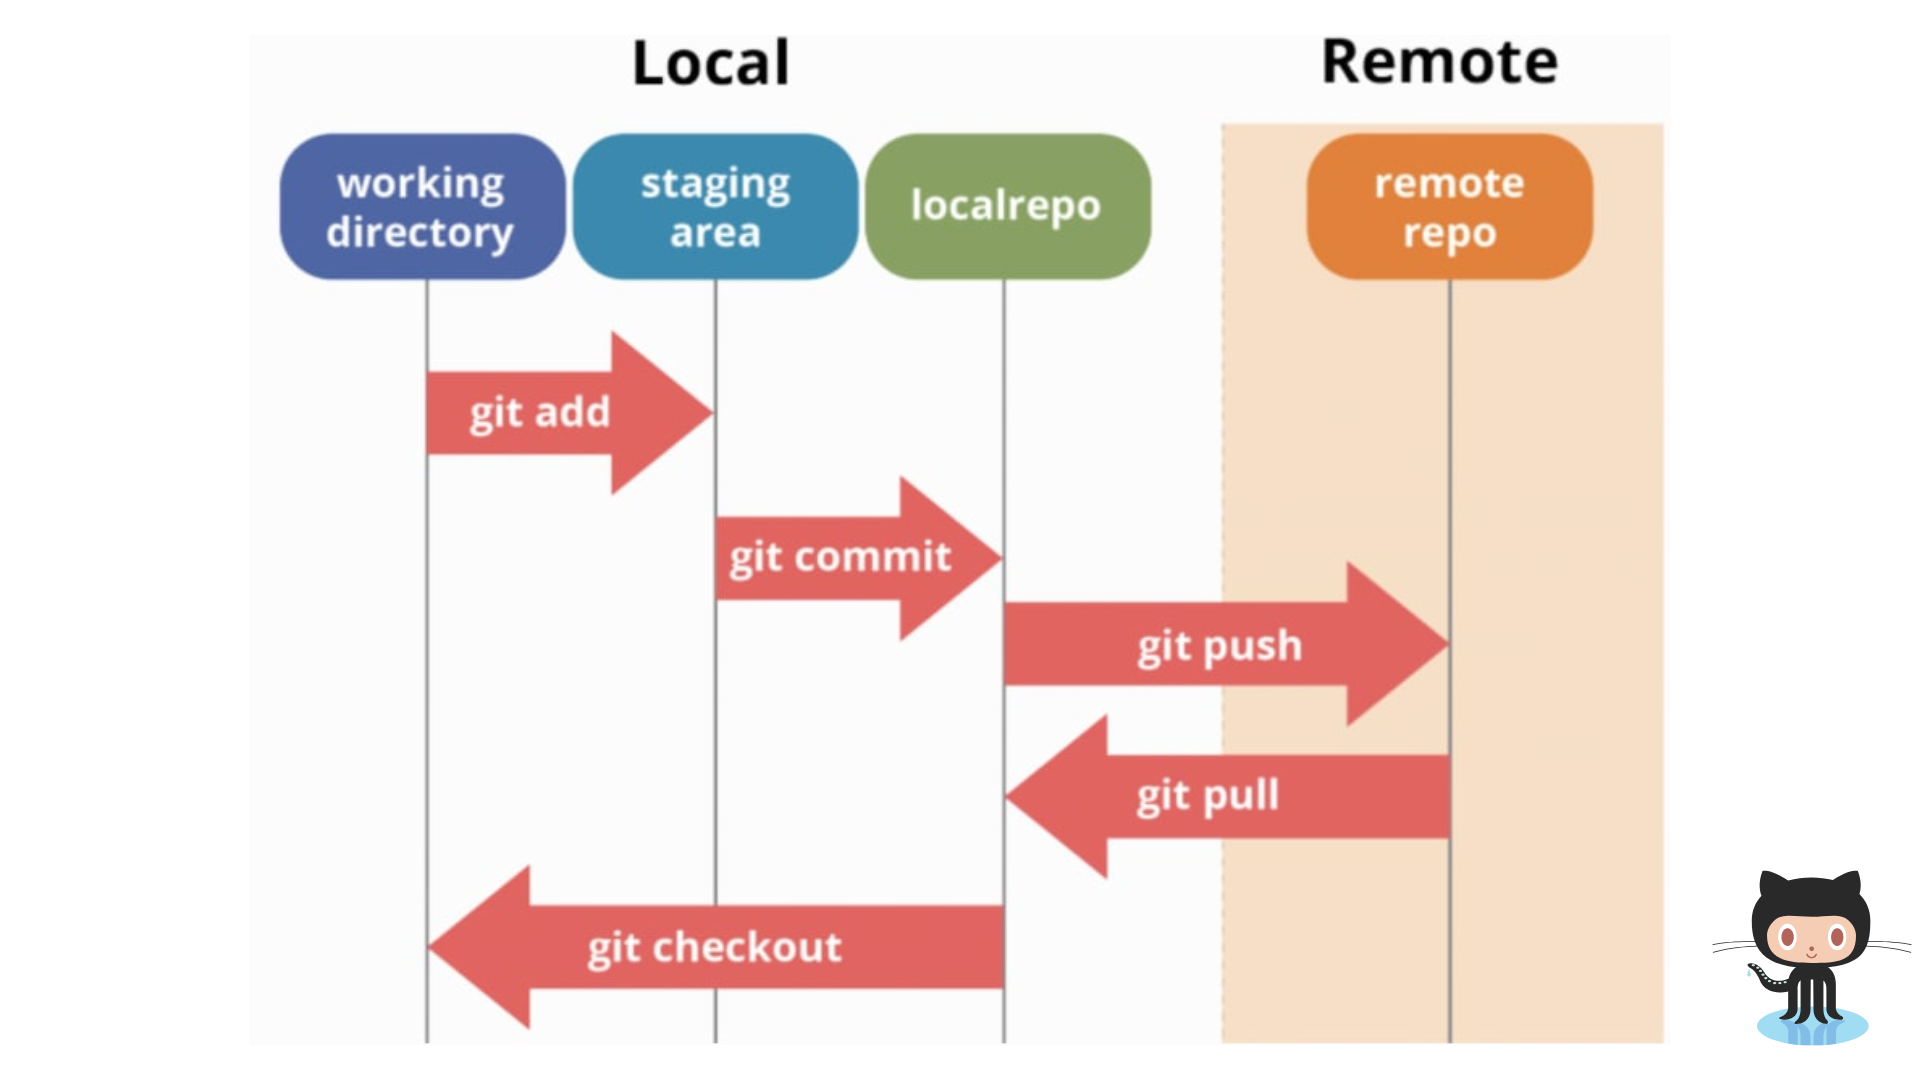
Let’s dive into the exciting world of project workflow with Git and GitHub, accompanied by nifty command line interface (CLI) commands that propel your project forward. Check out the diagram below – it’s like a map guiding you through the common steps in most projects.

Here’s the lowdown on each part of the diagram:
-
Working directory: Your local playground where you tweak your files. Fire up your favorite text editor or programming tools and let the creativity flow.
-
Staging area: Think of it as a waiting room for changes you’re planning to commit. When you tweak a file in the working directory, it’s not automatically tracked. Use the
git addcommand to usher it into the staging area. -
Repository (localrepo): This is the heart of it all, storing every commit made to your project. Committing changes creates a snapshot, capturing all the tweaks made since the last commit.
-
Remote repository (remoterepo): A distant twin of your local repository, hanging out on a remote server like GitHub. It’s your collaboration hub and a safety net for your project.
Hope the diagram paints a clearer picture of Git’s basic flow! Any questions so far?
Now, let’s break down a general Git workflow:
- Create a new local repository: Lay the groundwork for your project.
- Add files to your repository: Use
git addto bring the files you want under Git’s watchful eye. - Commit your changes: Snap a picture of your changes with
git commitand leave a note explaining what you did. - Connect to a remote repository (e.g., GitHub): Link your local and remote realms using
git remote addandgit push. - Push changes to the remote repository: Share your local brilliance with the world using
git push.
Rinse and repeat:
- Make local changes and commit: Keep fine-tuning your files with
git addandgit commit. - Push changes to the remote repository: Regularly send your local genius to the remote repository using
git push.
This is your basic Git dance. Tweak it as needed based on your project and collaboration style. As you get more comfy with Git, you’ll craft your unique dance moves.
Course completed
Have an issue? Please provide specific feedback by reporting an issue.